Note
This page is a reference documentation. It only explains the function signature, and not how to use it. Please refer to the user guide for the big picture.
nilearn.surface.vol_to_surf
- nilearn.surface.vol_to_surf(img, surf_mesh, radius=3.0, interpolation='linear', kind='auto', n_samples=None, mask_img=None, inner_mesh=None, depth=None)[source]
Extract surface data from a Nifti image.
Added in Nilearn 0.4.0.
- Parameters:
- imgNiimg-like object, 3d or 4d.
- surf_mesh
str,pathlib.Path,numpy.ndarray, orInMemoryMesh Either a file containing surface mesh geometry (valid formats are .gii or Freesurfer specific files such as .orig, .pial, .sphere, .white, .inflated) or a
InMemoryMeshobject with “coordinates” and “faces” attributes.- radius
float, default=3.0 The size (in mm) of the neighbourhood from which samples are drawn around each node. Ignored if inner_mesh is provided.
- interpolation{‘linear’, ‘nearest_most_frequent’}, default=’linear’
How the image intensity is measured at a sample point.
- ‘linear’:
Use a trilinear interpolation of neighboring voxels.
- ‘nearest_most_frequent’:
Use the most frequent value in the neighborhood (out of the n_samples samples) instead of the mean value. This is useful when the image is a deterministic atlas.
Added in Nilearn 0.12.0.
For one image, the speed difference is small, ‘linear’ takes about x1.5 more time. For many images, ‘nearest’ scales much better, up to x20 faster.
- kind{‘auto’, ‘depth’, ‘line’, ‘ball’}, default=’auto’
The strategy used to sample image intensities around each vertex.
- ‘auto’:
Chooses ‘depth’ if inner_mesh is provided and ‘line’ otherwise.
- ‘depth’:
inner_mesh must be a mesh whose nodes correspond to those in surf_mesh. For example, inner_mesh could be a white matter surface mesh and surf_mesh a pial surface mesh. Samples are placed between each pair of corresponding nodes at the specified cortical depths (regularly spaced by default, see depth parameter).
- ‘line’:
Samples are placed along the normal to the mesh, at the positions specified by depth, or by default regularly spaced over the interval [- radius, + radius].
- ‘ball’:
Samples are regularly spaced inside a ball centered at the mesh vertex.
- n_samples
intor None, default=None How many samples are drawn around each vertex and averaged. If None, use a reasonable default for the chosen sampling strategy (20 for ‘ball’ or 10 for ‘line’). For performance reasons, if using kind =”ball”, choose n_samples in [10, 20, 40, 80, 160] (defaults to 20 if None is passed), because cached positions are available.
- mask_imgNiimg-like object or None, default=None
Samples falling out of this mask or out of the image are ignored. If None, don’t apply any mask.
- inner_mesh
strornumpy.ndarrayor None, default=None Either a file containing a surface mesh or a pair of ndarrays (coordinates, triangles). If provided this is an inner surface that is nested inside the one represented by surf_mesh – e.g. surf_mesh is a pial surface and inner_mesh a white matter surface. In this case nodes in both meshes must correspond: node i in surf_mesh is just across the gray matter thickness from node i in inner_mesh. Image values for index i are then sampled along the line joining these two points (if kind is ‘auto’ or ‘depth’).
- depthsequence of
floator None, default=None The cortical depth of samples. If provided, n_samples is ignored. When inner_mesh is provided, each element of depth is a fraction of the distance from mesh to inner_mesh: 0 is exactly on the outer surface, .5 is halfway, 1. is exactly on the inner surface. depth entries can be negative or greater than 1. When inner_mesh is not provided and kind is “line”, each element of depth is a fraction of radius along the inwards normal at each mesh node. For example if radius==1 and depth==[-.5, 0.], for each node values will be sampled .5 mm outside of the surface and exactly at the node position. This parameter is not supported for the “ball” strategy so passing depth when kind==”ball” results in a ValueError.
- Returns:
- texture
numpy.ndarray, 1d or 2d. If 3D image is provided, a 1d vector is returned, containing one value for each mesh node. If 4D image is provided, a 2d array is returned, where each row corresponds to a mesh node.
- texture
Notes
This function computes a value for each vertex of the mesh. In order to do so, it selects a few points in the volume surrounding that vertex, interpolates the image intensities at these sampling positions, and averages the results.
Three strategies are available to select these positions.
- with ‘depth’, data is sampled at various cortical depths between
corresponding nodes of surface_mesh and inner_mesh (which can be, for example, a pial surface and a white matter surface). This is the recommended strategy when both the pial and white matter surfaces are available, which is the case for the fsaverage meshes.
- ‘ball’ uses points regularly spaced in a ball centered
at the mesh vertex. The radius of the ball is controlled by the parameter radius.
- ‘line’ starts by drawing the normal to the mesh
passing through this vertex. It then selects a segment of this normal, centered at the vertex, of length 2 * radius. Image intensities are measured at points regularly spaced on this normal segment, or at positions determined by depth.
- (‘auto’ chooses ‘depth’ if inner_mesh is provided and ‘line’
otherwise)
You can control how many samples are drawn by setting n_samples, or their position by setting depth.
Once the sampling positions are chosen, those that fall outside of the 3d image (or outside of the mask if you provided one) are discarded. If all sample positions are discarded (which can happen, for example, if the vertex itself is outside of the support of the image), the projection at this vertex will be
numpy.nan.The 3d image then needs to be interpolated at each of the remaining points. Two options are available: ‘nearest’ selects the value of the nearest voxel, and ‘linear’ performs trilinear interpolation of neighboring voxels. ‘linear’ may give better results - for example, the projected values are more stable when resampling the 3d image or applying affine transformations to it. For one image, the speed difference is small, ‘linear’ takes about x1.5 more time. For many images, ‘nearest’ scales much better, up to x20 faster.
Once the 3d image has been interpolated at each sample point, the interpolated values are averaged to produce the value associated to this particular mesh vertex.
Important
When using the ‘nearest_most_frequent’ interpolation, each vertex will be assigned the most frequent value in the neighborhood (out of the n_samples samples) instead of the mean value. This option works better if img is a deterministic atlas.
Examples
When both the pial and white matter surface are available, the recommended approach is to provide the inner_mesh to rely on the ‘depth’ sampling strategy:
>>> from nilearn import datasets, surface
>>> fsaverage = datasets.fetch_surf_fsaverage("fsaverage5")
>>> img = datasets.load_mni152_template(2)
>>> surf_data = surface.vol_to_surf(
...     img,
...     surf_mesh=fsaverage["pial_left"],
...     inner_mesh=fsaverage["white_left"],
... )
Examples using nilearn.surface.vol_to_surf
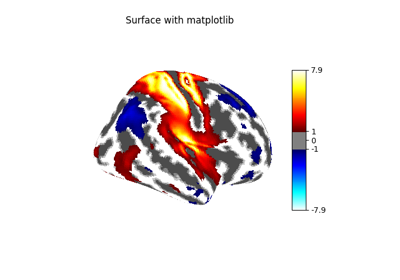
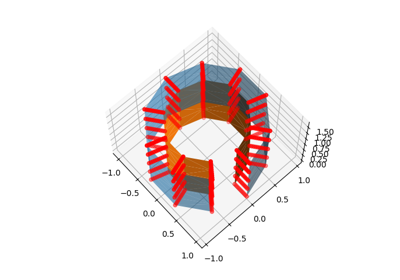
Technical point: Illustration of the volume to surface sampling schemes